STEP BY STEP
Dazzl e with Sprazzle!
NSI Nails South Africa walks us through the steps on how to do quick nail art designs in a salon that do not take up too much time and can be very cost-effective and not as time-consuming.
Three quick application techniques:
• We are applying a base layer that has a faded effect.
• We are developing a novel 3D glass effect that dries quickly, unlike acrylic.
• Embellishing it with dust will give it a pink pearlescent effect.
PART 1 Faded base colour layer with Trinkets Sprazzle
Step 1: To match your overall design, start with any base color of gel polish on your finished enhancements.
Step 2: Apply a layer of NSI Seal topcoat gel.
Step 3: Over the uncured layer of NSI Seal topcoat gel, hold the nail upright and parallel to the Sprazz’le bottle. Keep the bottle at a 90-degree angle, about 5 cm away from the nail. Press the pump down quickly and spray the pigment over the desired nail area. If you’d like to intensify the pigment, move the bottle closer. We used Wine Red for the first layer.
Step 4: While the NSI Seal topcoat gel is still uncured, continue with the second colour. We used purple as the second colour.
Step 5: Finish off with a third colour (we used Blush Pink). You can use as many colours as you like to create any desired effect.
Step 6: Cure the wet pigmented Sprazz’le layer in an LED or UV lamp.
Step 8: Once cured, continue with your carving gel design.
Step 7: Seal, finish off with NSI’s HEMA-Free Matt Top Coat, and cure.
PART 2 3D Glass with NSI Carving Gel
Design 1: Bling bow and shell
Step 1: Using a metal spatula, slice a small piece of NSI Carving Gel out of the jar. Place it on a palette and roll it into a round bead.
Step 2: Pick the bead up from the palette and press it into your finished nail design. Finish the nail with a matte or gloss top coat, ensuring that no tacky or dispersion layer remains on the nail. Keep pressing the bead over the nail with pressure to cover the surface from left to right.
Step 3: Once you have covered the required area, mould and shape the gel with mini silicone tools. For this step-by-step, we used Mini Silli’s from Nail Trinkets.
Step 4: Using my metal spatula, I pressed a line down the centre of the carving gel.
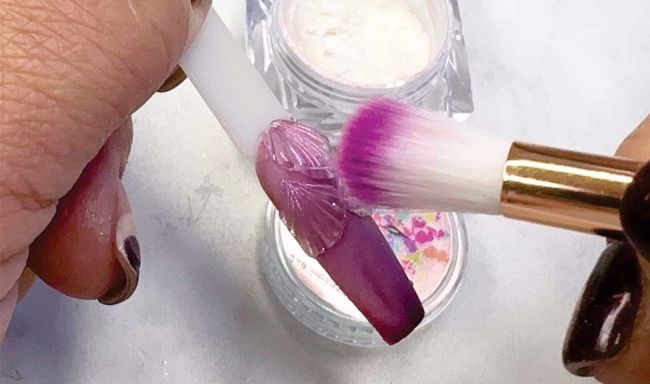
Step 5: Repeating towards the side, I pressed the spatula into the carving gel, slightly angled out, to start creating the shape of a shell.
Step 6: Once the pattern is complete, cure the carving gel in an LED or UV lamp for 60 seconds.
Design 2: Herringbone
Step 1: After slicing and rolling the carving gel bead on your palette, place it and press it evenly over the full nail.
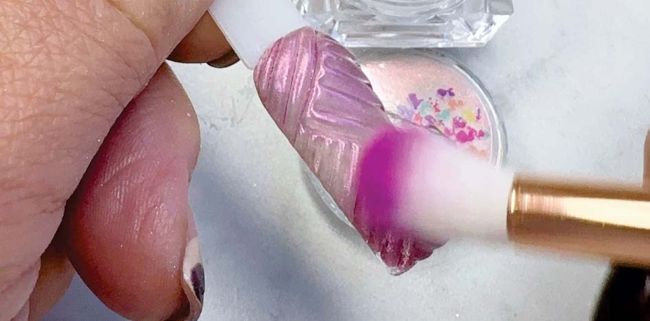
Step 2: Once you have covered the area needed, use a metal pusher to press straight, diagonal, parallel lines over the nail plate.
Step 3: Turn your metal pusher perpendicular to the first row of lines. To create lines, press them into the carving gel.
Step 4: Continue the pattern and repeat it until you have completed the entire nail.
Step 5: Once the pattern is complete, cure the carving gel in an LED or UV lamp for 60 seconds.
Design 3: Mermaid scale
Step 1: After slicing and rolling the carving gel bead on your palette, divide the one big bead into three equal, smaller bead sizes. Place the bead in the top centre of the nail and press down.
Step 2: Mould a teardrop shape with a mini silicone tool.
Step 3: With the metal spatula, push a line down the centre of the tear drop. Continue to press down slightly at an angle with the metal pusher to create a mini shell.
Step 4: Once the centre shell is complete, pick up the second bead and add it to the right side. Repeat the same steps with the second bead. On the left side, repeat with the third bead.
Step 5: Once the pattern is complete, cure the carving gel in an LED or UV lamp for 60 seconds.
PART 3 Embellishing with Pink Pearl Dust

Bling bow Shell_DUST

Herringbone_DUST

Mermaid Scale_DUST
In all three designs, the nail technician and client decide whether to embellish. If you choose not to use dust or chrome, then gently paint a super thin layer of top coat gel over the carving gel pattern and cure in a lamp.
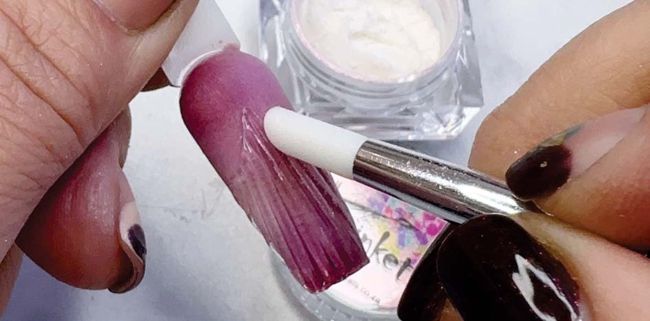
To create an embellished effect, use a mini silicone tool or a soft, fluffy art brush. Using very little, dust or rub small amounts of Trinkets Embellishing Dust over the design. In this design, Blushing was used because of its soft pink pearl effect. Finish off by sealing the design with a glossy top coat.
Katia Da Silva is the sole distributor of NSI Nail products in South Africa as well as the founder of Nail Trinkets nail art accessories. Katia has been a qualified nail technician for almost 27 years. Her love for nails has motivated her to compete within NSI in South Africa and internationally. For more than five years, Katia has been one of three global educators for NSI headquarters in Philadelphia, USA. She still loves working on clients and, as an educator at heart, meeting and empowering new techs, professionals and artists in the industry. The dedication and talent she encounters every day when meeting technicians worldwide inspires Katia.